


Solar Panel Installation Guide: 7 Steps to Install Solar Panels At Home in India
How are solar panels installed? Click here for a detailed 2022 solar panel installation guide with 6 simple steps (with pictures) to properly install solar panels. The post Solar Panel Installation Guide: 7 Steps to Install Solar Panels At Home in India appeared first on Rooftop Solar for your home and more - Blog | SolarSquare.
India is a tropical country with monsoons so intense that, many times, roof-mounted solar panels end up getting uprooted due to cyclonic winds. Therefore, treating solar panel installation as a DIY task isn’t ideal. On the contrary, when tackled by experts, on-grid solar system installation for home can be safely executed in the following seven steps:
- Step 1: Rooftop inspection and 365 day shadow analysis to determine the ideal panel location and direction
- Step 2: Installing the solar mounting structures of ideal height while eliminating water leakage risk
- Step 3: Securing solar panels atop the mounting structures
- Step 4: Inverter installation and electrical wiring
- Step 5: Replacing a regular energy meter with a bi-directional net meter
- Step 6: Earthing and lightning protection
- Step 7: Commissioning the solar system
Ready to learn how to install solar panels at home in India without making them susceptible to damage from storms, cyclones, human error, and material manhandling? Dive in and explore the seven solar panel installation steps in detail.
How to Install Solar Panels on Your Home in 7 Easy Steps?
How to install solar panels at home? We get this question a lot. It’s asked so frequently that we decided to create a step-by-step guide on installing solar panels on roofs, so you know what the right solar panel installation method is.
Let’s get started without further ado!
#1. How to Install Solar Panels at Home? Step 1: Rooftop Inspection
Selecting an ideal shadow-free spot on the roof for solar panel installation is of utmost importance. A typical rooftop encounters a number of shadow-casting objects such as nearby trees, adjacent houses or buildings, mobile towers, water tanks, staircase rooms or mumties, and even satellite dishes.
Although it might feel that an area is free of shadow to the naked eye, it is not possible to say with certainty that there shall be no shadows at all times of day and throughout the entire year.
Here’s everything experts at SolarSquare do during a rooftop inspection to avoid issues like shadows:
- A Detailed Engineering Site Visit: A trained professional will conduct a site visit to record all shadow-casting objects on your roof and their locations and heights.
- Shadow Analysis Using Advanced Software: Based on the engineer’s input, our design team will conduct a real-time shadow analysis and create a 3D plant layout using the Google SketchUp software. This ensures that the panels remain shadow-free from 9 AM to 4 PM throughout the year after solar panel installation is finished.
- Ideal Panel Direction: As India is in the northern hemisphere, the direction of solar panels should be towards the south to maximize the solar radiation received. A direction towards east or west can also be considered if a southward direction is not possible due to constraints in the available area. North direction of solar panels should be strictly avoided as it will result in a significant reduction in energy generation.
- Determining the Panel Tilt and Slope: The tilt or slope angle of the solar panels should ideally be equal to the latitude of the location, as it maximizes energy generation. This ranges from 10 degrees in South India to 30 degrees in North India.
- Choosing an Ideal Location for Solar Inverters: Solar inverters should be installed in an indoor location or in shade from direct sunlight. They must be at eye level (around 4 to 5 ft height from ground) for ease of monitoring & maintenance.
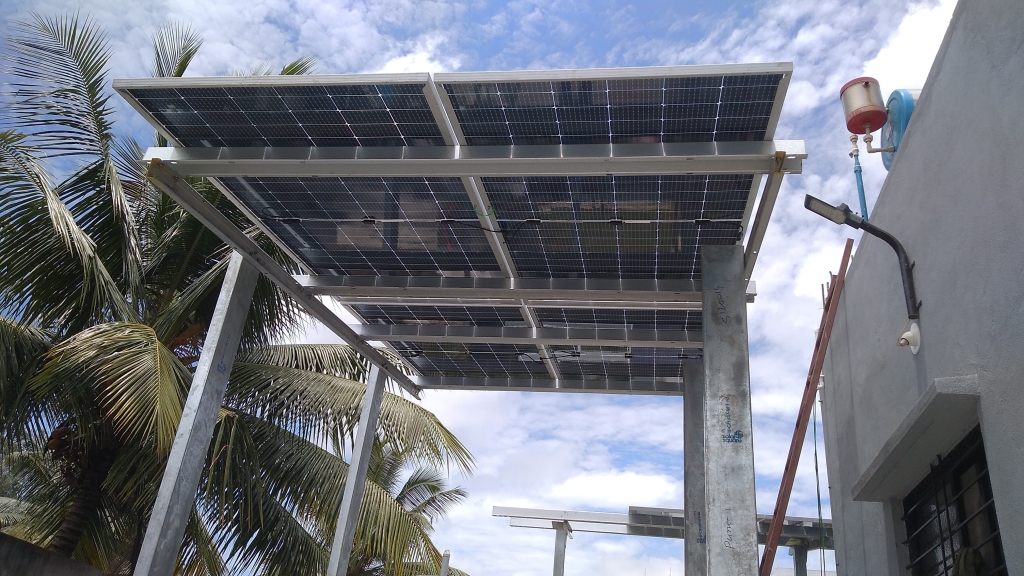
#2. How to Install Solar Panels on Your Home? Step 2: Installing Solar Mounting Structures
The first component installed before solar panels is the solar mounting structures. There are a variety of mounting structures available for installation on metallic shed, on RCC terrace, on Mangalore tiles, and so on.
Here’s a snapshot of everything one needs to consider when installing solar mounting structures on a roof:
- Using Elevated Mounting Structures: Increasing the height of mounting structures on an RCC terrace can reduce the shadow cast on solar panels and also allow the terrace area underneath the panels to be utilized for other purposes.
- Evaluate Mounts for Wind Bearing Capacity: Mounting structures are the most critical component to ensure the solar panel installation is safe during heavy winds and cyclones. They should be evaluated using software such as STAAD.pro for the wind loads applicable at the installation location, to determine section sizes, and bending moment calculations using the parameters defined in the Indian Standard IS 875.
- Evaluate the Method Used to Fix the Structures to the Roof: It’s recommended to use a specialized waterproofing chemical by HILTI to create an airtight seal. This seal ensures that microcracks that occur on an RCC roof due to drilling are completely sealed. SolarSquare uses this technique to ensure water leakage doesn’t occur. If it still does, we offer our customers a Rs. 1 lakh leakage-free guarantee for one year.
- Evaluate the Material and Coating: Steel and aluminium are the most commonly used materials. Steel should be galvanized for corrosion protection. Welding of structural components on-site should be avoided, as it can lead to the removal of protective coatings and accelerate rusting.
Did you know? SolarSquare’s WindPro Mount mounting structures are approved by IIT Bombay and designed to meet the BIS engineering standards. They ensure your solar system can easily withstand wind speeds of up to 170 km/h. Moreover, our mounts are made of virgin steel and boast an impressive 80-micron HDGI (hot-dipped galvanized iron) coating, which is rust-proof. mounting structures are approved by IIT Bombay and designed to meet the BIS engineering standards. They ensure your solar system can easily withstand wind speeds of up to 170 km/h. Moreover, our mounts are made of virgin steel and boast an impressive 80-micron HDGI (hot-dipped galvanized iron) coating, which is rust-proof. |
#3. How to Install Solar Panels on Roofs? Step 3: Securing Solar Panels Atop the Mounting Structures
| Did you know? Solar panels are installed on the mounting structures using nut-bolt fasteners of SS-304 grade. It is critical to ensure solar panel installation is done in adherence to the manufacturer’s installation manual. Any deviations from the instructions may lead to the manufacturer’s warranty on the panels being void. |
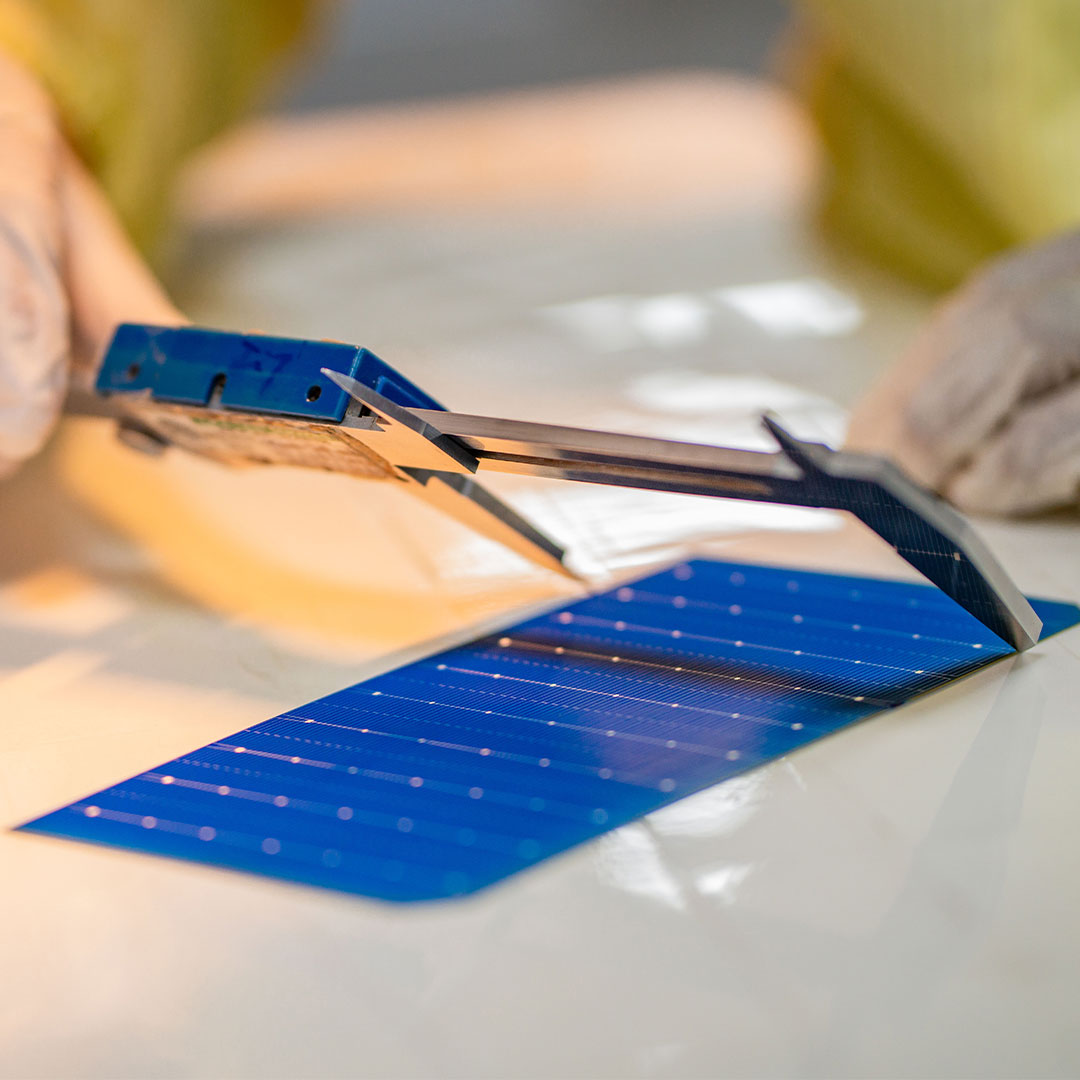
Appropriate handling and lifting of panels as per the manufacturer’s guidelines is critical to ensure there is no invisible damage to the silicon cells inside the panel.
Here’s how the sanctity of panels can be maintained during the solar panel home installation process:
- Handling by Experts: Only trained and experienced professional teams should be engaged for securing solar panels to mounting structures.
- Connecting Panels in Series to Make a String: Solar panels are connected in series by attaching the positive cable of one panel to the negative cable of the next panel, and so on. This is called a string, whose output voltage is the sum of the voltage of all panels connected in series.
- Using Specialized Tools for Fastening the Panels: Specialized tools such as torque wrenches should be used for the assembly of mounting structures and solar panels to ensure that all connections are fully tightened.
#4. How to Install Solar Panels? Step 4: Inverter Installation and Electrical Wiring
Depending on the project and inverter capacity, multiple strings are created and are connected in parallel to achieve the desired output voltage and system capacity.
Here’s how the entire set-up is executed:
- Each String is Connected to a DC Combiner Box: This provides electrical surge protection and DC isolation. Then, the string is connected to the inverter using solar-grade DC cables.
- Using MC4 Connectors: All DC cable connections are made using MC4 connectors, which should be crimped onto the cables using a specialized MC4 crimping tool only. As string voltages are in the range of 1000 V DC, DC wiring is a potential source of electrical shock and short circuit if the connections are loose or done using improper tools.
- Connecting Inverter Output: The inverter output is connected to the electricity grid at the energy meter through an AC Combiner Box, which provides electrical surge protection and AC isolation. Electrical lugs of the appropriate size, as per the cable size, must be used for AC cable connections, with electrical termination standard practices followed.
- Cable Routing Inside Conduit Pipes: All cables are routed inside PVC or HDPE conduit pipes for protection. Cable trays may be used in cases where a large number of DC strings or large-sized AC cables are present. Cable routing in pipes or trays requires very precise alignment, which has a big impact on the overall aesthetics of the solar panel installation.
#5. How to Install Solar Panels at Home in India? Step 5: Replacing a Regular Energy Meter with a Bi-Directional Net Meter
For an on-grid rooftop solar panel installation for homes, the regular energy meter is replaced by a bi-directional net meter by the Discom.
Here’s how this net meter works:
- Keeps Track of the Energy Exchange Between the Grid and the Solar Energy System: The net meter measures both the number of electricity units imported from and exported to the grid.
- Solar Bill is Generated Based on the Unit Exchange Recorded by the Net Meter: If your plant exports more power to the grid than what’s imported, your discom offers you credits. If the plant imports more power than it supplies to the grid, you’re charged for the net units consumed (import units minus export units). This process is called net metering.
#6. How to Install Solar Panels on Your Home? Step 6: Earthing and Lightning Protection
Earthing is provided to the DC components (solar panels and DC combiner box) and AC components (inverter and AC combiner box) using separate earthing cables.
Here’s a detailed breakdown of how this is executed:
- Creating an Earthing Grid: The earthing grid is constructed using maintenance-free earthing kits, which comprise earthing rods and chemical compounds.
- Accurate Spacing Between Earthing Rods: Earthing should be provided in soft soil rather than concrete or tiled areas, with a spacing of 2 to 3 meter between each earthing rod. It should be as close to the solar installation as possible to reduce the length of cables used.
- Installing a Lightning Arrester: A Franklin rod type lightning arrester is installed near the solar panels at a height of at least 1 meter above the panels. It is connected to the earthing grid using a 16 sq mm (or higher) earthing cable.
#7. How to Install Solar Panels at Home? Step 7: Commissioning the Solar System
This is the last and final step in solar panel installation at homes. Once all connections as described in the aforementioned steps are done and the energy meter is replaced with a net meter by the Discom, the system is ready for charging and generation.
Here’s what’s done before making the plant functional:
- Final Checklist: The output voltage of the DC strings and the phase sequence of the AC connection are checked before the inverter is switched on. The digital display on the inverter is used to monitor the units generated and basic voltage & current parameters. This confirms that the system is functioning smoothly.
- Connecting the Inverter to the Internet: The inverter is connected to the internet using a Wi-Fi signal available at the inverter location, or via a SIM-based dongle. An internet connection is required for real-time online monitoring of plant performance. This helps identify issues in generation and rectify them at the earliest opportunity to minimize downtime.
4 Mistakes You Must Avoid When Installing Solar Panels on Roofs At Home
Can’t hold back your excitement at how your neighbors no longer have to pay for electricity ever since they installed solar at home? Want to head out and get a solar energy system installed at your place right away? Don’t (just yet!).
Rushing into solar panel installation at home can do more harm than good when you don’t understand the common pitfalls. If that sounds like you, we’ve got your back. Check out the four common mistakes that many homeowners make – but you don’t have to – when going solar.
#1. Not Estimating Your Home’s Energy Consumption For Ideal System Size
Solar can make your electricity bills zero but only if you choose the right system size. The right size solar is something that covers all your energy requirements.
Based on yearly power consumption, here’s a snapshot of the suitable solar system size:
Number of Units Consumed Yearly Right Solar System Size 2,800 to 2,900 units 2 kW 4,200 to 4,350 units 3 kW 5,600 to 5,800 units 4 kW 7,000 to 7,250 units 5 kW 14,000 to 14,500 units 10 kW
Watch this video that explains how to find out the right solar system size for your home, step-by-step.
#2. Not Choosing the Latest and Most Efficient Solar Panels From Reputable Brands
Choosing the best solar panels that are efficient and offer longer warranties is essential. You can put your trust in the latest technology bifacial solar panels or mono-PERC half-cut solar panels since they boast efficiencies as high as 22% and 22.5% respectively.
You should buy panels from reputable solar panel manufacturers, including Navitas, Premier Energies, and ReNew.
#3. Not Choosing a Reputed Solar Installation Company for Project Execution
Your choice of solar company matters just as much as the choice of panels and mounting structures.
Here’s everything you should keep in mind when choosing a solar panel installation company:
- Check Customer Reviews on Google: Choosing a company like SolarSquare, which boasts an impressive 4.8 rating on Google from 7,000 customers, establishes the fact that your solar panel installation is being handled by professionals who know what they’re doing.
- Look for Companies That Are Empanelled by the Discom: Choosing empanelled companies to install solar at your home ensures you’re working with professionals licensed for the job.
- Look at the Company’s Offerings: Choose a brand that offers extensive after-sales services and savings guarantee on solar, so your investment remains safe for years to come.
Choosing SolarSquare as your trusted solar panel installation partner has the following benefits:
- Guaranteed Savings: We’re India’s first and ONLY solar company offering a savings guarantee with a money-back promise. If the system we install fails to generate the units we committed to you, we will reimburse you for the deficit units at Rs. 8 per unit.
- Extensive 5-year System Maintenance: As a part of our after-sales services, we offer a minimum of 45 maintenance visits in a span of 5 years to ensure your system remains in top-notch condition.
- Zero-Investment Plan: We offer a zero-investment plan that makes your down payment essentially zero. That’s because the subsidy you receive strikes off the down payment. Moreover, we offer EMIs ranging from 6 months to 60 months, allowing you to select a plan that suits your budget. If you really think you can’t afford going solar, we’d say think again!
SolarSquare also specializes in installing rooftop solar for housing societies. You can also contact our team for installing commercial rooftop systems.
#4. Not investing in Maintenance After Solar Panel Installation
It’s statistically proven that solar panels that are not cleaned professionally for 2 years start producing 30% less electricity by year 2 than systems that are periodically cleaned. And that’s exactly why you need a company like SolarSquare that offers extended after-sales services to take care of your system’s health.
Conclusion
A good quality solar panel installation is nothing but the result of good planning and execution. It begins with a thorough system design to evaluate shadows, ensure the stability of the mounting structure under wind loads, and carefully select electrical components.
A well-trained professional team must be engaged in system installation to ensure the correct handling of all components and the flawless execution of the project, following all Standard Operating Procedures. Need further assistance? Get in touch with experts at SolarSquare – we offer free guidance with no obligation to buy solar from us. You buy only if you are satisfied.
FAQs
Q1. Is 3 kW enough to run a house?
Ans. Yes, a 3 kW solar system can easily power a 2-3 BHK home in India. It generates 4,200 to 4,350 units of electricity yearly. You can also run a 1.5-ton AC on a 3 kW solar system.
Q2. Can AC run on solar panels?
Ans. Absolutely. A 3 kW solar system can run a single 1.5-ton AC. However, it takes a 5 kW solar system to run two AC’s (1.5 tons each).
Q3. What is an off-grid solar system?
Ans. An off-grid solar system is a standalone system that is not connected to the utility grid. Instead, it is connected to a battery bank with lithium batteries for storing the electricity generated by solar panels.
The post Solar Panel Installation Guide: 7 Steps to Install Solar Panels At Home in India appeared first on Rooftop Solar for your home and more - Blog | SolarSquare.
What's Your Reaction?